
Introduction
A couple of months ago I’ve described how to transfer data from Apache Spark to PostgreSQL by creating a Spark ForeachWriter in Scala.
This time I will show how this can be done in C#, by creating a ForeachWriter for .NET for Apache Spark.
To create a custom ForeachWriter, one needs to provide an implementation of the IForeachWriter interface, which is supported from version 0.9.0 onward. I am going to use version 0.10.0 in this article, however.
Documentation of the C# Interface is provided within the related source code:
https://github.com/dotnet/spark/blob/master/src/csharp/Microsoft.Spark/Sql/ForeachWriter.cs
The example project I am going to create, is named HelloForeachWriter and will do the following.
- Watch a folder ( “/tempdata/in” ) for incoming data in the JSON format.
- Read that data and write it into a PostgreSQL table.
It is developed in C# using .NET Core 3.1 and EntityFrameworkCore.
Test Data
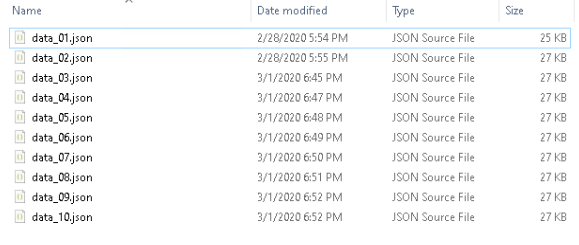
I have prepared 10 files to test the streaming process.
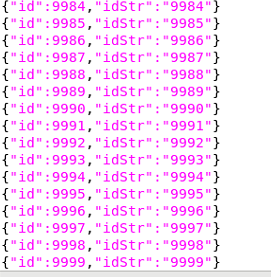
Keeping things simple, each line of the file(s) just contains a unique number (id) and a string (idStr). They are actually the same, except that the latter is converted to a string.
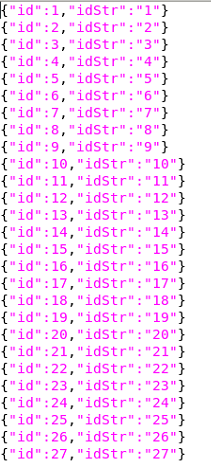
The first file (data_01.json) contains id 1 to 999; data_02.json, id 1000 to 1999; data03.json, id 2000 to 2999 and so on. The last id in the last file is 9999.
If you want, you can download a copy of the data from here.
Prepare the Database
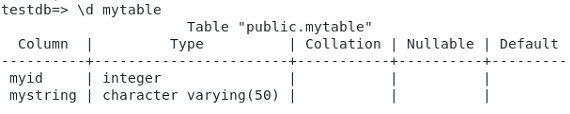
The DB setup is kept very simple. I have created a new database named “testdb”. It contains a table named “mytable”, which reflects the structure of the JSON files and therefore just contains one integer column “myid” and a varchar column with the name “mystring”
CREATE TABLE mytable (myid INT, mystring VARCHAR(50));
I have also created a user named “testuser”, which has permissions to read/write data from/into “mytable”.
Create .NET Core project
In case you haven’t installed .NET Core 3.1 yet, just download it from https://dotnet.microsoft.com/download and follow the install tutorial for your platform.
Once installed, navigate to a folder that you want to create the project under, and use this command in a console window to create the HelloForeachWriter console project.
dotnet new console -f netcoreapp3.1 -n HelloForeachWriter
After execution, just change into the freshly created project directory.
cd HelloForeachWriter
It is now time, to add the required nuget packages:
dotnet add package Microsoft.Spark --version 0.10.0
dotnet add package Npgsql.EntityFrameworkCore.PostgreSQL --version 3.1.2
Database Model and Context
Before we look at the .NET for Apache Spark related code, let’s first implement the bits that are required by EntityFrameworkCore to access the database.
If you have used Entity Framework before, the code below shouldn’t contain any surprises. Otherwise, I would recommend the EFCore GitHub page as a starting point for diving into it.
There are two basic components that are needed for this example to work.
- A class that represents our table columns as an C# object
- Another class that derives from the EntityFramework DbContext and represents our DB session and exposes the properties of the table/columns.
Model
The POCO (Plain-Old CLR Object) for the table is very simple and shown below.
public class MyTable
{
    public int MyId { get; set; }
    public string MyString { get; set; }
}
Context
The context implementation requires just a bit more work.
- Specify the DB driver with the connection string
- Create a public DbSet propery of type MyTable to provide access to the table
- Set the table and column properties
So here is how the class named “MyContext” looks like.
public class MyContext : DbContext
{
    public DbSet<MyTable> MyTableDbSet { get; set; }

    protected override void OnConfiguring(DbContextOptionsBuilder optionsBuilder)
        => optionsBuilder.UseNpgsql("Host=192.168.10.169;Database=testdb;Username=testuser;Password=TestM30ut");

    protected override void OnModelCreating(ModelBuilder modelBuilder)
    {
        modelBuilder.Entity<MyTable>()
        .ToTable("mytable")
        .HasKey(k => k.MyId);

        modelBuilder.Entity<MyTable>()
        .Property(p => p.MyId)
        .HasColumnName("myid")
        .HasColumnType("int");

        modelBuilder.Entity<MyTable>()
        .Property(p => p.MyString)
        .HasColumnName("mystring")
        .HasColumnType("varchar");
    }
}
So let’s briefly walk through this.
Line 3 makes the table available as an entity set. It usually represents a database table, and an entity relates to a row within the table. In this case the row is of type MyTable.
In line 5/6 the context is configured to use the Npsql driver – along with its connection string – that we made available via the nuget package (Npgsql.EntityFrameworkCore.PostgreSQL) earlier.
Lines 10 – 12 maps an entity of type MyTable to the database table “mytable”. It also sets the key of MyTable to be MyId. As you might have noticed, I didn’t specify a primary key in the CREATE TABLE statement earlier. However, Entity Framework needs a key to work properly and MyId is an obvious choice, even though this is not enforced on the database itself.
Some basic properties, namely the column name and data type of the columns, are defined in line 14 – 17 and 18 – 22, respectively.
MyContext.cs
Keeping things simple, the two classes are consolidated into one file named MyContext.cs (shown below).
using Microsoft.EntityFrameworkCore;

namespace HelloForeachWriter
{
    public class MyContext : DbContext
    {
        public DbSet<MyTable> MyTableDbSet { get; set; }

        protected override void OnConfiguring(DbContextOptionsBuilder optionsBuilder)
            => optionsBuilder.UseNpgsql("Host=192.168.10.169;Database=testdb;Username=testuser;Password=TestM30ut");

        protected override void OnModelCreating(ModelBuilder modelBuilder)
        {
            modelBuilder.Entity<MyTable>()
            .ToTable("mytable")
            .HasKey(k => k.MyId);

            modelBuilder.Entity<MyTable>()
            .Property(p => p.MyId)
            .HasColumnName("myid")
            .HasColumnType("int");

            modelBuilder.Entity<MyTable>()
            .Property(p => p.MyString)
            .HasColumnName("mystring")
            .HasColumnType("varchar");
        }
    }

    public class MyTable
    {
        public int MyId { get; set; }
        public string MyString { get; set; }
    }
}
That should be all that is needed to access the data in our PostgreSQL table.
Program.cs
If you followed the steps above to create the HelloForeachWriter project, a default Program.cs file, similar to the one shown below, should have been created as well.
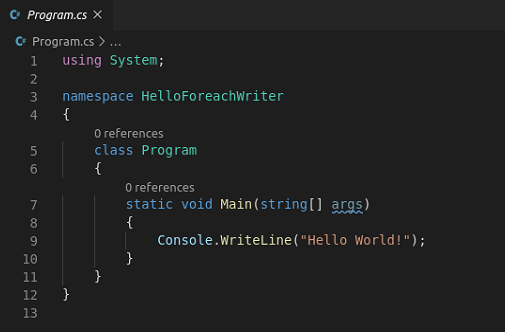
Remember what the application is supposed to do? It needs to monitor the directory “/tempdata/in”, read the data of any new file that’s put into that directory and then store that data in the database. We can do all of this, using .NET for Apache Spark.
So, to get started, let’s replace Console.WriteLine with a call to a new method that will get implemented as we move ahead.
static void Main(string[] args)
{
    RunSparkStream("/tempdata/in");
}
For the lack of something better, I just named this method RunSparkStream. As you can see, the method takes the path of the to be monitored directory as an argument.
Now let’s see how this method is actually implemented.
public static void RunSparkStream(string streamInputPath)
{
    var foreachWriter = new MyForeachWriter();

    var spark = SparkSession.Builder().GetOrCreate();

    var mySchema = new StructType(new[]
        {
            new StructField("id", new IntegerType()),
            new StructField("idStr", new StringType())
        });

    var lines = spark
        .ReadStream()
        .Schema(mySchema)
        .Json(streamInputPath);

    var s_query = lines
        .WriteStream()
        .Foreach(foreachWriter)
        .Trigger(Trigger.ProcessingTime(5000))
        .Start();

    s_query.AwaitTermination();
}
Let’s walk through the code again.
As this article is about writing data to the database via a ForeachWriter, line 3 is there to create a new instance of an IForeachWriter implementation that I just call MyForeachWriter.
It obviously doesn’t exist yet, but of course I want to save the best bit until the end. So just read on.
Line 5 just creates a new spark session, which we obviously going to need.
In line 7 – 11 I define the data schema that reflects the structure of the JSON data in the test files.
Lines 13 to 16 create a DataStreamReader that monitors the streamInputPath directory (“/tempdata/in”) and imports the file content into a dataframe named “lines”, using the schema defined above.
Now that we got a dataframe, we can create a query that will put the ForeachWriter to work via a DataStreamWriter (lines 18 – 20).
Using a trigger that will query for new data every 5 seconds (line 21), we can finally start the execution of the streaming query (line 22).
Line 24 allows the processing to happen in the background but will “block” the main thread until processing is stopped. Either manually or due to an exception. More on that later.
MyForeachWriter
OK. Now here comes that bit, you are probably most interested in.
Just to remind you. The IForeachWriter interface is defined in the following file of the .NET for Apache Spark project on GitHub.
https://github.com/dotnet/spark/blob/master/src/csharp/Microsoft.Spark/Sql/ForeachWriter.cs

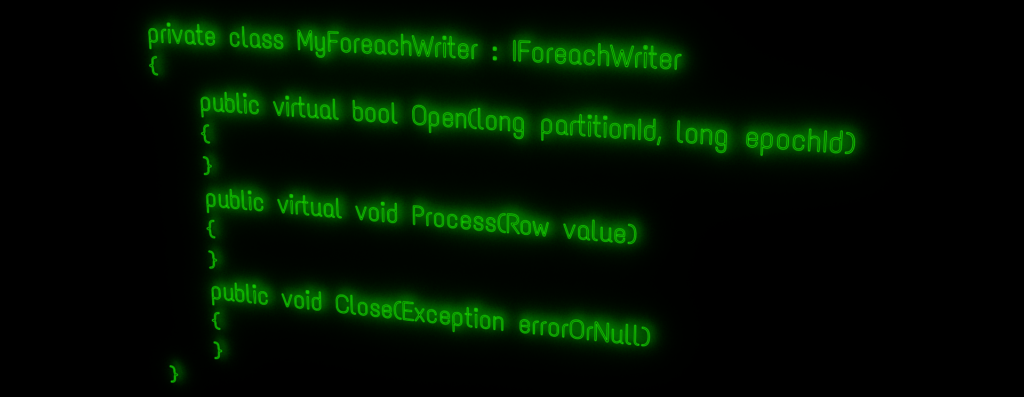
In order to implement that interface, the MyForeachWriter class needs to contain three methods with the following signatures:
- bool Open(long partitionId, long epochId)
- void Process(Row value)
- void Close(Exception errorOrNull)
Equipped with that knowledge, let’s see how an example implementation could look like, considering that we want to write the data to PostgreSQL.
[Serializable]
/// <summary>
/// Implementation of IForeachWriter using an EntityFrameworkCore DbContext
/// </summary>
/// <see cref="https://github.com/dotnet/spark/blob/master/src/csharp/Microsoft.Spark/Sql/ForeachWriter.cs"/>
private class MyForeachWriter : IForeachWriter
{
    [NonSerialized]
    private MyContext _ctx;

    public virtual bool Open(long partitionId, long epochId)
    {
        try
        {
            _ctx = new MyContext();

            Console.WriteLine($"Created new database context ({partitionId}, {epochId})");

            return true;
        }
        catch
        {
            return false;
        }
    }

    public virtual void Process(Row value)
    {
        var id = value.GetAs<int>("id");
        var idStr = value.GetAs<string>("idStr");

        _ctx.Add(new MyTable { MyId = id, MyString = idStr });
    }

    public void Close(Exception errorOrNull)
    {
        if(errorOrNull != null){
            _ctx.Dispose();
            Console.WriteLine($"Error: {errorOrNull.Message}");
            return;
        }

        try
        {
            var records = _ctx.SaveChanges();
            Console.WriteLine($"Saved {records} records");
        }
        finally
        {
            _ctx.Dispose();
        }
    }
}
Focusing on the most important lines, here is a quick run-through of the code.
First, it is important that the class is serializable, hence the related attribute in line 1.
The reason is explained in ForeachWriter.cs
/// Any implementation of this class must be <see cref="SerializableAttribute"/> because each
/// task will get a fresh serialized-deserialized copy of the provided object.
As we need to make our Entity Framework context (MyContext) available to all three methods, it is declared in line 9. However, we do not want it to be serialized (line 8).
Line 15 is part of the Open method and creates a new db context every time the Open method is called.
The Process method (line 27 – 33) is called for every row in the dataframe and basically tells Entity Framework to create and track a new MyTable entity for each row in memory. Note that this does not actually write the data to the database yet.
Writing the data to PostgreSQL is done in the Close method, by _ctx.SaveChanges() in line 45. It looks up all the new MyTable entities that have been tracked in memory only so far, and tries to persist them in the database.
Close also takes care of disposing the database context. Either after writing the data to the table (line 50), or if there were some problems during processing earlier (lines 37 – 41).
Stopping the query on exit
Alright. Lots of stuff covered so far. There’s one little detail missing, however.
At the moment, the streaming query would continue to run, even if our C# application would be stopped/killed. That’s not exactly what I want and therefore the final code, that is listed below, shows how to deal with this.
using Microsoft.Spark.Sql;
using Microsoft.Spark.Sql.Streaming;
using Microsoft.Spark.Sql.Types;
using System;
using System.Threading;

namespace HelloForeachWriter
{
    class Program
    {
        private static readonly AutoResetEvent s_waitHandle = new AutoResetEvent(false);
        private static StreamingQuery s_query;

        static void Main(string[] args)
        {
            SetupExitHandlers();

            Console.WriteLine("Press CTRL+C to exit.");
            Console.WriteLine();

            RunSparkStream("/tempdata/in");

            // Wait for signal on the main thread
            s_waitHandle.WaitOne();
        }

        private static void SetupExitHandlers()
        {
            Console.CancelKeyPress += (s, e) =>
            {
                Console.WriteLine($"{Environment.NewLine}Ctrl+C pressed");
                Environment.Exit(0);
            };

            AppDomain.CurrentDomain.ProcessExit += (s, e) =>
            {
                Console.WriteLine($"{Environment.NewLine}Exiting");

                // stop spark query
                s_query.Stop();

                // Allow the main thread to continue and exit...
                s_waitHandle.Set();
            };
        }

        public static void RunSparkStream(string streamInputPath)
        {
            var foreachWriter = new MyForeachWriter();

            var spark = SparkSession.Builder().GetOrCreate();

            var mySchema = new StructType(new[]
                {
                    new StructField("id", new IntegerType()),
                    new StructField("idStr", new StringType())
                });

            var lines = spark
                .ReadStream()
                .Schema(mySchema)
                .Json(streamInputPath);

            s_query = lines
                .WriteStream()
                .Foreach(foreachWriter)
                .Trigger(Trigger.ProcessingTime(5000))
                .Start();

            s_query.AwaitTermination();
        }

        [Serializable]
        private class MyForeachWriter : IForeachWriter
        {
            [NonSerialized]
            private MyContext _ctx;

            public virtual bool Open(long partitionId, long epochId)
            {
                try
                {
                    _ctx = new MyContext();
                    Console.WriteLine($"Created new database context ({partitionId}, {epochId})");
                    return true;
                }
                catch
                {
                    return false;
                }
            }

            public virtual void Process(Row value)
            {
                var id = value.GetAs<int>("id");
                var idStr = value.GetAs<string>("idStr");
                _ctx.Add(new MyTable { MyId = id, MyString = idStr });
            }

            public void Close(Exception errorOrNull)
            {
                if(errorOrNull != null){
                    _ctx.Dispose();
                    Console.WriteLine($"Error: {errorOrNull.Message}");
                    return;
                }

                try
                {
                    var records = _ctx.SaveChanges();
                    Console.WriteLine($"Saved {records} records");
                }
                finally
                {
                    _ctx.Dispose();
                }
            }
        }
    }
}
So now the application should stop the query (line 40) on exit. Either by pressing CTRL+C (29-33), or if it is closed (35-45).
HelloForeachWriter in action
If you don’t happen to have Apache Spark and .NET for Apache Spark installed on your system, you might want to give my docker image a try. It is available via https://hub.docker.com/r/3rdman/dotnet-spark and some related articles available here.
For testing out HelloForeachWriter on Linux, I have used the following command to fire up the docker container.
docker run -d --name dotnet-spark -p 8080:8080 -p 8081:8081 -p 5567:5567 -p 4040:4040 -v "$HOME/DEV/HelloUdf/bin/Debug:/dotnet/Debug" 3rdman/dotnet-spark:0.10.0
Below is a quick recording of HelloForeachWriter in action. Enjoy and hopefully I’ll see you around again soon.
8. May 2020
[…] .NET for Apache Spark ForeachWriter & PostgreSQL […]
22. September 2020
[…] you followed my post about using the ForeachWriter to stream data to PostgreSQL using EntityFrameworkCore, you could think that doing the same for SQL Server might just require some minor tweaks. […]